
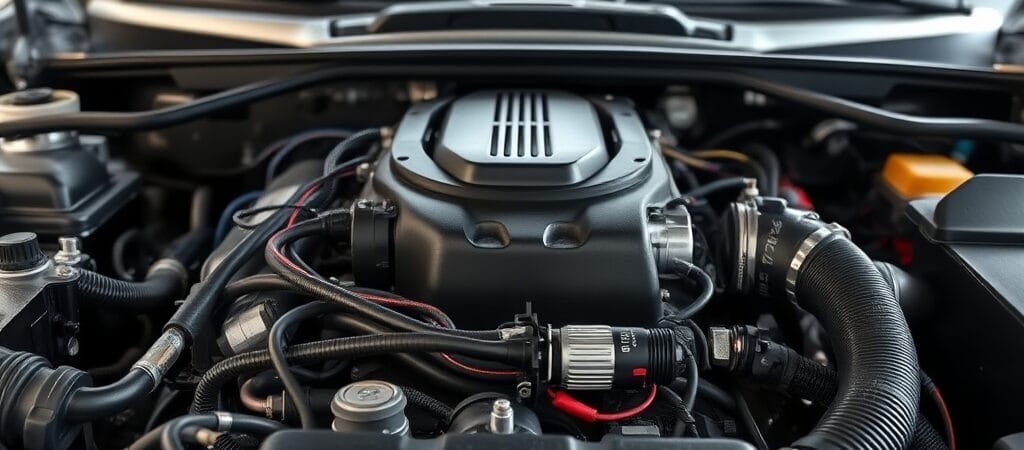
The P0111 code indicates that the engine control module (ECM) or powertrain control module (PCM) has detected a range or performance problem involving the Intake Air Temperature (IAT) sensor circuit.
The IAT sensor measures the temperature of air entering the engine. This information helps the engine computer calculate air density and adjust engine operation.
When the IAT reading does not behave as expected under specified conditions, the computer may store P0111 and illuminate the check engine light.
However, P0111 does not automatically mean the IAT sensor has failed. Wiring faults, connector problems, sensor contamination, or incorrect temperature readings may also contribute.
This guide explains the meaning of P0111, possible symptoms, common causes, diagnostic procedures, and repair options.
What Does the P0111 Code Mean?
P0111 is a generic OBD-II diagnostic trouble code commonly described as Intake Air Temperature Sensor 1 Circuit Range/Performance.
It indicates that the ECM or PCM has detected an IAT signal that does not meet its expected operating criteria.
Depending on the vehicle, the computer may compare intake air temperature with other temperature readings, evaluate how the signal changes during operation, or apply other manufacturer-specific plausibility checks.
A reading that remains fixed, changes unexpectedly, or disagrees with expected conditions may cause the code to be stored.
How Does the IAT Sensor Work?
On many vehicles, the IAT sensor is a negative temperature coefficient (NTC) thermistor.
Its electrical resistance generally decreases as temperature increases.
The engine computer uses the sensor circuit to interpret this resistance as an intake air temperature reading.
On a common two-wire thermistor circuit, the ECM supplies a pull-up voltage through an internal resistor and monitors the resulting signal.
The exact circuit design and expected values vary by vehicle.
Some vehicles have an independent IAT sensor, while others integrate it into a mass airflow (MAF), manifold pressure (MAP), or combined sensor assembly.
Is P0111 the Same as an IAT Circuit High or Low Code?
No.
P0111 concerns the range or performance of the monitored IAT signal.
Other IAT-related codes may identify electrical input conditions, such as circuit low or circuit high.
A range/performance fault may involve an implausible temperature reading even when the sensor’s electrical signal is not simply stuck at its minimum or maximum.
The exact diagnostic criteria depend on the vehicle manufacturer.
Common Symptoms of the P0111 Code
Check Engine Light
An illuminated check engine light is the most common indication of P0111.
The code may appear alone or with other intake air, temperature, or engine-management codes.
Reduced Fuel Economy
Incorrect intake air temperature information may affect engine-management calculations.
Depending on the vehicle’s control strategy, this can contribute to increased fuel consumption.
However, poor fuel economy has many possible causes.
Rough Idle
Some vehicles may experience unstable idling when temperature information is inaccurate.
The symptom is not specific to P0111 and should be evaluated alongside other diagnostic evidence.
Hesitation or Reduced Performance
Incorrect temperature information may contribute to hesitation or reduced engine response in certain operating conditions.
The severity varies by engine and control strategy.
Starting Difficulties
In some applications, an implausible IAT reading may affect starting or warm-up behavior.
This is not a universal symptom of P0111.
No Noticeable Symptoms
Many vehicles may continue to operate normally from the driver’s perspective.
The ECM may compensate for an unreliable reading by using substitute values or information from other sensors.
A lack of noticeable symptoms does not rule out an IAT circuit fault.
Common Causes of the P0111 Code
1. Faulty IAT Sensor
An IAT sensor may become inaccurate or respond incorrectly to temperature changes.
Its resistance or signal may no longer correspond to the expected temperature relationship.
However, sensor failure should be confirmed through testing before replacement.
2. Damaged Wiring
Damaged wiring can disrupt the IAT signal.
Possible problems include:
Broken or frayed wires
Damaged insulation
Intermittent open circuits
Shorts between circuits
Previous wiring repairs
These faults may produce unstable or implausible temperature readings.
3. Loose or Corroded Connector
Corrosion, moisture intrusion, damaged terminals, or a loose connector can interfere with the sensor circuit.
Intermittent connection problems may appear only during vibration or temperature changes.
4. Sensor Contamination
Oil deposits, dirt, or other contamination may affect the sensor’s response in some designs.
Contamination does not automatically establish that the sensor is defective.
Inspect the component according to the manufacturer’s service information.
5. Incorrect Sensor Installation or Replacement Part
An incorrectly installed sensor, incompatible replacement component, or damaged sensor housing may contribute to abnormal readings.
This is particularly relevant if the code appeared after recent intake-system or sensor repairs.
6. Intake Airflow or Temperature Measurement Problems
An abnormal intake arrangement, damaged ducting, or sensor installation issue may affect the temperature measured by the IAT sensor.
However, an intake air leak does not automatically cause P0111.
Investigate these conditions only when the vehicle’s diagnostic evidence supports them.
7. Rare ECM or PCM Fault
An internal engine computer fault is possible but uncommon.
Before considering module replacement, confirm that the sensor, wiring, connectors, and related circuits operate correctly.
P0111 alone does not establish an ECM failure.
How to Diagnose the P0111 Code
Accurate diagnosis requires checking whether the IAT reading is plausible and whether the sensor circuit operates correctly.
Step 1: Verify the Complaint
Confirm whether the check engine light is illuminated.
Record any reported symptoms, including rough idle, hesitation, increased fuel consumption, or starting difficulties.
Ask whether the problem appeared after recent intake-system maintenance or sensor replacement.
Step 2: Scan for Codes and Freeze-Frame Data
Connect a suitable OBD-II scanner.
Confirm whether P0111 is stored, pending, or active.
Check for related codes involving:
Intake air temperature
MAF or MAP sensors
Engine coolant temperature
Sensor electrical circuits
Engine-management systems
Review freeze-frame data where available.
For help interpreting stored trouble codes, see our How to Read OBD2 Codes guide.
Step 3: Inspect the Sensor and Wiring
With the ignition off, locate the relevant IAT sensor using vehicle-specific service information.
Inspect accessible components for:
Damaged wiring
Loose connectors
Corroded terminals
Moisture intrusion
Broken connector locks
Incorrect sensor installation
Obvious contamination
If the IAT sensor is integrated into another sensor assembly, follow the appropriate procedure for that design.
Step 4: Compare Temperature Readings With the Engine Cold
When the vehicle has been parked long enough for temperatures to stabilize, review the IAT reading using a scan tool.
Where supported, compare it with ambient temperature and other relevant temperature readings, such as engine coolant temperature.
On a fully cooled engine, these readings may be reasonably close, allowing for sensor location, heat soak, ambient conditions, and measurement differences.
Do not expect them to be identical.
A large unexplained difference may indicate a problem that requires further testing.
Step 5: Observe IAT Live Data
Monitor the intake air temperature reading during appropriate operating conditions.
Look for:
Implausible temperature values
Sudden unexplained changes
A reading that remains fixed when change is expected
Intermittent signal dropouts
Differences from other relevant temperature information
Remember that intake air temperature can rise after engine shutdown because of heat soak.
Temperature changes are not automatically evidence of a fault.
Step 6: Test the IAT Sensor Circuit
Use the manufacturer’s wiring diagram and approved diagnostic procedure.
Depending on the design, testing may include:
Checking sensor resistance at a known temperature
Comparing resistance with a temperature specification chart
Checking the signal circuit
Testing the low-reference or ground circuit
Inspecting for open circuits or shorts
Checking connector terminal integrity
Many conventional IAT sensors are thermistors rather than active sensors requiring a separate power supply.
Do not assume every IAT sensor has the same number of terminals or electrical characteristics.
Step 7: Check Sensor Response to Temperature Changes
Where the manufacturer’s procedure permits, evaluate whether the sensor responds appropriately to controlled temperature changes.
For a conventional NTC thermistor, resistance generally decreases as temperature increases.
The expected values depend on the specific sensor.
Avoid applying excessive heat, exposing the sensor to open flames, or using unapproved test methods.
Step 8: Investigate Intermittent Problems
If the fault appears intermittently, inspect the wiring harness and connector for damage.
A qualified technician may monitor live data while performing manufacturer-approved connection checks.
Do not pull on wires or damage connector seals.
Step 9: Confirm the Root Cause
Before selecting a repair, determine whether testing supports:
A defective IAT sensor
Damaged wiring
A poor electrical connection
An incorrect replacement component
Sensor contamination
An installation problem
Another confirmed electrical fault
Replace parts only when the diagnostic findings justify doing so.
Repair Options After Diagnosis
Replace a Confirmed Faulty IAT Sensor
If testing confirms the IAT sensor is defective, replace it with a compatible component.
Some vehicles use an integrated IAT sensor that is not serviced separately.
Follow the manufacturer’s instructions for the specific assembly.
Repair Damaged Wiring
If damaged wiring is confirmed, repair the affected circuit using approved methods.
Protect repaired wiring from heat, vibration, and abrasion.
Repair Electrical Connectors
If a connector has corroded terminals, damaged seals, or poor contact, repair or replace the affected components.
Confirm that the connector locks securely into place.
Address Sensor Contamination
If contamination is identified, follow the manufacturer’s cleaning or replacement recommendations.
Do not spray cleaning chemicals onto an IAT, MAF, or combined sensor assembly unless the procedure and product are approved for that component.
Correct Installation Problems
If the sensor is incorrectly installed or an incompatible part was fitted, correct the installation using the appropriate component and service procedure.
Investigate Control Module Faults Only When Confirmed
ECM or PCM replacement should be considered only after vehicle-specific testing conclusively identifies an internal module fault.
Control module replacement may require programming or configuration.
How to Verify the P0111 Repair
After completing the confirmed repair:
Confirm that the sensor and electrical connectors are installed correctly.
Verify that any repaired wiring is secure and protected.
Review IAT live data for plausible temperature readings.
Compare the readings with appropriate reference temperatures under suitable conditions.
Clear the relevant diagnostic trouble codes using a suitable scan tool.
Operate the vehicle under the conditions required for the applicable diagnostic monitor.
Confirm that P0111 does not return.
Check for related codes and verify normal engine operation.
If the code returns, continue diagnosis rather than replacing additional components without evidence.
The check engine light remaining off immediately after clearing codes does not, by itself, prove that the fault has been repaired.
Safety Considerations When Diagnosing P0111
Follow appropriate precautions when working near engine components and electrical circuits.
Park the vehicle securely on a level surface.
Keep hands, clothing, and tools away from moving belts and cooling fans.
Be cautious around hot engine and exhaust components.
Switch off the ignition before disconnecting components unless the approved procedure requires otherwise.
Use appropriate electrical-testing equipment.
Avoid shorting sensor terminals or ECM circuits.
Do not apply external voltage to sensor circuits without an approved procedure.
Avoid damaging wiring insulation or connector seals.
Work in a properly ventilated area when operating the engine.
Seek professional assistance if the required electrical tests cannot be performed safely.
Vehicle-Specific Considerations for P0111
IAT sensor arrangements vary between vehicle manufacturers.
Some engines use a standalone sensor in the intake duct or manifold.
Others integrate the IAT function into a MAF, MAP, or combined sensor assembly.
Certain engines may use multiple intake air temperature sensors.
The correct sensor location, resistance values, circuit design, and diagnostic thresholds depend on the vehicle.
Always consult manufacturer-specific service information before identifying terminals, testing circuits, or replacing components.
Frequently Asked Questions
What does the P0111 code mean?
P0111 indicates that the engine computer has detected a range or performance problem involving the Intake Air Temperature Sensor 1 circuit.
It does not automatically mean the sensor is defective.
What are the common symptoms of P0111?
Possible symptoms include an illuminated check engine light, rough idle, reduced fuel economy, hesitation, or starting difficulties.
Some vehicles may have no noticeable symptoms.
What causes the P0111 code?
Possible causes include an inaccurate IAT sensor, damaged wiring, poor connector contact, contamination, or an installation problem.
The actual cause must be confirmed through diagnosis.
Can a dirty IAT sensor cause P0111?
Contamination may affect sensor operation in some designs.
However, dirt alone does not establish the cause of P0111, and cleaning is not appropriate for every sensor assembly.
Can P0111 cause engine overheating?
P0111 concerns intake air temperature measurement, not the engine coolant temperature circuit.
It is not normally a direct indication of engine overheating.
Is P0111 the same as a circuit high or low code?
No.
P0111 concerns range or performance. Other IAT codes may identify specific high-input or low-input electrical conditions.
Can I drive with the P0111 code?
Some vehicles may remain drivable, but engine performance or fuel economy may be affected.
If the engine stalls, loses significant power, or behaves unpredictably, stop driving and arrange inspection.
How is P0111 diagnosed?
Diagnosis involves checking stored codes, reviewing live IAT data, inspecting the sensor and wiring, comparing temperature readings, and performing vehicle-specific electrical tests.
Does P0111 mean I need a new IAT sensor?
No.
The sensor should be replaced only if testing confirms that it is faulty.
How do I know the repair worked?
Verify plausible IAT readings, confirm normal circuit operation, and check that P0111 does not return after the relevant diagnostic monitor runs.
Final Checks
The P0111 code indicates a range or performance problem involving the Intake Air Temperature Sensor 1 circuit.
Although an inaccurate sensor is one possible cause, wiring damage, poor connections, contamination, and installation problems must also be considered.
Begin with code verification and a visual inspection, then compare IAT live data with appropriate temperature references.
Use manufacturer-specific electrical tests to confirm the root cause before replacing components.
Finally, verify plausible sensor readings and confirm that P0111 does not return after the repair.