
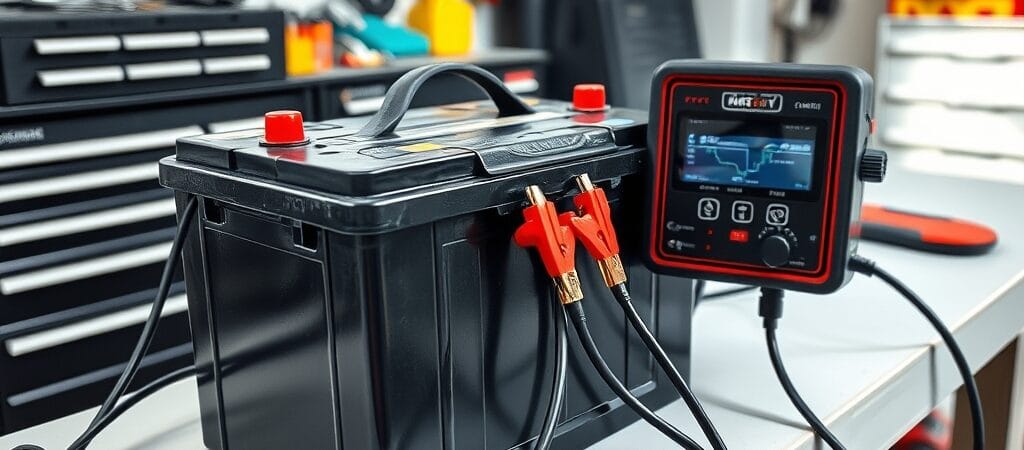
Testing a car battery under load can help determine whether it can supply adequate current when electrical demand is high. However, an accurate battery assessment requires more than applying a load and reading a single voltage value. Battery type, state of charge, temperature, rated capacity and the test method all affect how the results should be interpreted.
This guide explains how to inspect the battery, prepare it for testing, perform an appropriate load or conductance test, and interpret the results without replacing the battery based on one symptom or measurement alone.
How to Test a Car Battery Under Load
A battery can show an apparently reasonable open-circuit voltage and still perform poorly when substantial current is required. Load testing evaluates battery performance under controlled electrical demand, while many modern battery testers use conductance or other electronic test methods.
The correct procedure depends on the battery type, rating and test equipment. Always follow the battery and tester manufacturers’ instructions when establishing test conditions and pass/fail criteria.
Why Battery Testing Under Load Matters
Open-circuit voltage can provide useful information about battery state of charge, but it does not by itself establish the battery’s ability to support high-current demand.
Testing the battery under an appropriate load—or using a suitable electronic battery tester—can provide additional information about battery condition. Test results should still be considered alongside battery charge state, connections, starting-system behavior and charging-system performance.
If you’re troubleshooting a starting problem where the electrical accessories still operate, see our guide to Car Won’t Start but Lights Work for additional diagnostic steps.
Signs That May Justify Battery Testing
Battery testing may be appropriate when a vehicle has symptoms such as:
- Slow cranking: Low battery output can contribute to slow cranking, but poor cable connections, excessive voltage drop, starter problems or mechanical resistance can produce similar symptoms.
- Repeated need for jump starting: This can occur with a weak or discharged battery, but parasitic draw, charging-system problems or vehicle-use patterns should also be considered.
- Electrical behavior during starting: Lights or accessories may dim substantially during cranking when system voltage drops, but this observation alone does not identify the battery as the cause.
- Battery-related starting problems: A no-start or slow-crank complaint should be diagnosed systematically rather than attributed to the battery from symptoms alone.
- Corrosion or poor terminal connections: Corrosion, looseness or damaged connections can increase resistance and interfere with starting-system performance even when the battery itself is serviceable.
Tools for Battery Testing
The exact equipment depends on the test method. Useful equipment may include:
- Appropriate battery tester: A carbon-pile/load tester, conductance tester or other tester suitable for the battery type and rating.
- Digital multimeter: Useful for voltage measurements and related electrical diagnosis.
- Eye and hand protection: Appropriate protection should be used when working around lead-acid batteries.
- Battery-service tools where required: Use suitable tools and manufacturer-approved cleaning methods if connections need service.
Steps to Test a Car Battery Under Load
Following the correct procedure is crucial for accurate battery testing.
Step 1: Verify the Complaint
Determine why the battery is being tested. Confirm whether the concern is slow cranking, a no-crank condition, repeated discharge, recent jump-starting or another electrical problem.
Do not assume the battery is defective from the complaint alone. Starting problems can also result from cable resistance, poor grounds, starter faults, charging-system problems, parasitic draw or other electrical conditions.
For a broader starting-system diagnostic process, see our guide on How to Diagnose a Car That Won’t Start.
Step 2: Inspect the Battery and Connections
Before testing, inspect the battery for obvious physical damage, leakage, severe corrosion, loose connections or other unsafe conditions. Do not perform a load test on a battery that is visibly damaged, leaking, frozen or otherwise unsafe to test.
Inspect accessible terminals and cable connections for looseness, corrosion or damage. Connection problems should be corrected using appropriate service procedures because excessive resistance can affect starting performance and test interpretation.
Step 3: Check Battery State of Charge
Before applying a conventional load test, determine whether the battery has an adequate state of charge according to the tester and battery manufacturer’s procedure. A substantially discharged battery can produce a poor test result even when discharge—not permanent battery failure—is the immediate problem.
If charging is required, use a charger appropriate for the battery type and follow the battery and charger manufacturers’ instructions. Allow for any required stabilization period before testing.
Step 4: Identify the Battery Rating and Test Requirements
Locate the battery’s applicable rating and identify its type. Configure or select the test method according to the battery and tester manufacturers’ instructions.
Do not use a generic load value or pass/fail voltage for every battery. Required load, test duration, temperature compensation and acceptable voltage depend on the battery and testing procedure.
Step 5: Connect the Tester Safely
With the vehicle and unnecessary electrical loads switched off, connect the tester according to its instructions and observe correct polarity.
Keep sparks, flames and smoking materials away from the battery. Make final connections and operate the tester exactly as its manufacturer specifies.
Step 6: Perform the Load Test
Apply only the load and test duration specified for the battery and tester being used. Observe the voltage response and stop the test if the battery becomes unsafe, behaves abnormally or the equipment instructs you to stop.
Do not repeatedly apply heavy loads in an attempt to make the battery pass or fail.
Step 7: Interpret the Result Using the Correct Specification
Compare the result with the criteria supplied for the specific test method, battery rating and temperature.
Do not use 9.6 volts as an unconditional universal threshold. A value around 9.6 V is associated with certain traditional 12-V lead-acid load-testing procedures under specified conditions, but temperature and test procedure matter. The tester/battery specifications should determine the actual pass/fail criterion.
If the result is questionable, verify battery charge state, terminal condition and test setup before condemning the battery.
Electronic or Conductance Battery Testing
Many modern battery testers evaluate battery condition without applying the same sustained high-current load used by traditional carbon-pile testers. Depending on the tester, the user may enter battery type and rating before the instrument evaluates the battery and provides a result.
Follow the tester manufacturer’s prompts and specifications. A tester result should still be considered alongside the vehicle complaint and the condition of the starting and charging systems.
Battery Test vs. Cranking Voltage Test
A battery load test and a cranking-system voltage test are related but are not identical procedures. Measuring voltage while the starter operates shows how the electrical system behaves during actual cranking, while a controlled battery test evaluates the battery using a defined testing method.
Abnormal cranking voltage does not automatically prove battery failure because cable voltage drop, poor grounds, starter current demand and connection problems can affect the result.
What to Do After Testing
If the battery passes the appropriate test but the vehicle still cranks slowly or repeatedly discharges, continue diagnosing the starting, charging and electrical systems rather than replacing the battery.
If testing indicates a discharged battery, determine why it became discharged where appropriate and recharge/test it according to the applicable procedure.
Replace the battery when testing performed under the correct conditions supports battery failure. Use a replacement with the specifications and battery technology required for the vehicle.
Some vehicles may require battery registration, adaptation or other vehicle-specific procedures after replacement.
Safety When Load Testing a Car Battery
Automotive lead-acid batteries can produce explosive gases and contain corrosive electrolyte. Wear appropriate eye and hand protection and keep sparks, flames and smoking materials away from the battery.
Do not test a battery that is frozen, leaking, severely damaged or otherwise unsafe. Avoid placing conductive tools across battery terminals, observe correct polarity, and follow the battery and tester manufacturers’ connection and disconnection procedures.
Heavy-load testing can generate significant current and heat. Use test equipment rated for the battery and never exceed the specified load or test duration.
Hybrid and electric vehicles may contain both a conventional low-voltage battery and a high-voltage traction system. This article applies to appropriate low-voltage automotive battery testing; do not perform high-voltage system work without the required procedures, training and equipment.

Frequently Asked Questions
What does a battery load test tell you?
A properly performed load test helps evaluate whether a battery can maintain adequate voltage while supplying a specified electrical load. Results must be interpreted according to the battery rating, temperature and test procedure.
Can a battery show good voltage and still be bad?
Yes. Open-circuit voltage alone does not fully establish a battery’s ability to provide high current. A battery may require load, conductance or other appropriate testing to evaluate its condition.
Is 9.6 volts always the minimum for a battery load test?
No. Approximately 9.6 V is associated with certain traditional 12-V lead-acid load-test conditions, but the appropriate threshold depends on temperature and the specified test procedure. Follow the battery and tester manufacturers’ criteria.
Should I load-test a discharged battery?
A substantially discharged battery can produce misleading results. Check its state of charge first and charge it according to the applicable procedure when required before interpreting a conventional load test.
Does a failed battery test always mean the battery must be replaced?
First verify that the battery was adequately charged, the connections and test setup were correct, and the correct test method and specifications were used. If a valid test confirms battery failure, replacement is appropriate.
What if the battery passes but the car still cranks slowly?
Continue diagnosis. Excessive cable voltage drop, poor connections, starter problems, charging-system faults and mechanical resistance can also contribute to slow cranking.
Final Checks
Testing a car battery under load can provide valuable information about its ability to supply current, but the result is meaningful only when the battery is prepared and tested correctly.
Verify the complaint, inspect the battery and connections, establish an appropriate state of charge, use a test method suitable for the battery type and rating, and interpret the result using the correct temperature-dependent specifications. Replace the battery only when valid testing supports the diagnosis, and continue with starting or charging-system diagnosis when the battery itself tests satisfactorily.